Configuring Events Detection
How to Configure Event Detection
The Event Detection wizard enables you to more easily configure models for event detection. When you select an event you want to detect, the wizard automatically selects a basic model and dynamically displays the various properties that must be configured for the selected model. Also refer to Event Detection Wizard Fields.
TIP: For Plant Applications 6.1.4 (April 2015), 6.2.3 (July 2015), and 6.3, Production models have a new configuration parameter (Auto Move End Time) under the General tab to set an interval for automatically adjusting the end time of an event, while the event is in process, in order to update event dimensions. Refer to Periodic Event Dimension Update.
If the selected model does not meet your needs, click More Models on the General tab to select and configure a different model.
After selecting a model type, the Event Detection wizard automatically displays the options and fields required for configuring the selected model. For models that require VB script, sample scripts are provided that can be used or edited.
Keep in mind that the models available for selection are controlled by your license.
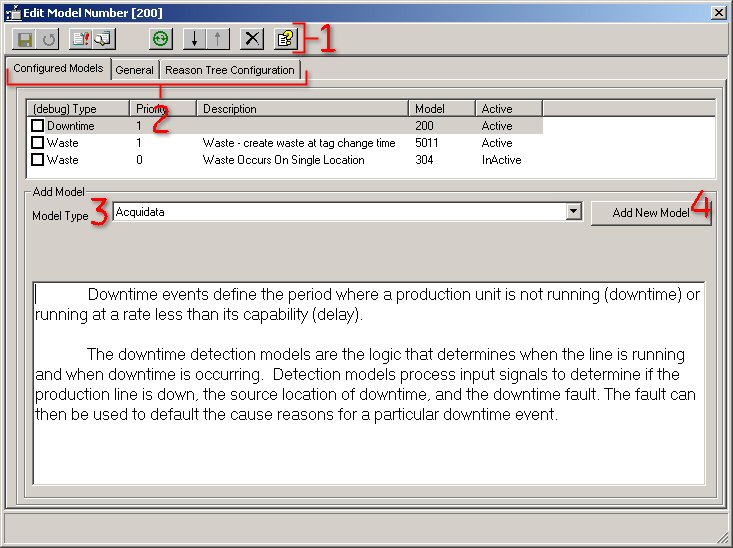
1 The buttons on the toolbar change according to the active tab (2).
2 The available tabbed pages are determined by the selected model.
3 Select a model type from the Model Type list, then click Add New Model (4).
To open the Event Detection wizard
-
In the Plant Applications Administrator, expand
 Plant Model.
 -
Expand the appropriate department and production line.
-
Right-click the production unit and click Configure Events on <production unit>. The Event Detection wizard appears.
-
From the Model Type list , select the model type that corresponds to the type of event you want to detect and then click Add New Model. The model is added under Configured Models and the tabs necessary for configuring the selected model type appear.
-
Click the tabs to configure the selected model.
NOTE: If the selected model does not meet your needs, click More Models on the General tab to view a list of additional models based on the selected model type.
-
Click
 to save the configuration.
 -
Do one of the following to activate the model.
-
Click Yes when asked if you want to activate the model
-
Click
 to activate the model
See Also