
Inspection Management Upgrade
Upgrade Inspection Management
The following tables outline the steps that you must complete to upgrade this module to the latest version. These instructions assume that you have completed the steps for upgrading the basic APM system architecture.
These tasks may be completed by multiple people in your organization. We recommend, however, that the tasks be completed in the order in which they are listed.
| Step | Task | Notes |
|---|---|---|
| 1 | Revert the following query to baseline to view the inspections in the Integrity mobile app:
| This step is required only if you have previously modified the queries. |
| 2 | Revert the following query to baseline to optimize the performance of the NR-13 report:
| This step is required only if you have previously modified the query. |
| 3 | Revert the following query to baseline to optimize the performance of the All Tasks page in the Integrity Mobile app:
| This step is required only if you have previously modified the query. |
| 4 | Revert the following query to baseline to view more information in the Manage Deferral page:
| This step is required only if you have previously modified the query. |
| 5 | Revert the following query to baseline to view more information in the Task Execution section of the Inspection Task page under the Related Records tab:
| This step is required only if you have previously modified the query. |
| 6 | Revert the following queries to baseline to enable use of Advanced Visualization reports:
| This step is required only if you have previously modified the query. |
Remove Offline Option for Related Families of Checklist Inspection Template
About This Task
Procedure
- Log in to APM as an Inspection Administrator.
- In the module navigation menu, select .
- Select
 .
. - Select Event Configurations.
- In the Checklist Inspection Template row, select the link in the Related Families column.
- For the General Findings, Bundle Sub-Inspection, and Pressure Test Sub-Inspection families, clear the check box in the Offline column.
- Select Done.
- Select
 .
.
Revert Inspection Management Queries to Baseline
This action is required only if you have modified the Inspection Management queries.
About This Task
Procedure
- Select the check box next to the query that you want to revert, and then select
 .The Confirm Delete window appears, asking you to confirm if you want to delete the selected query.
 - Select the check box next to the query that you want to revert, and then select
 .The Catalog Folder Browser window appears.
Inspection Datasheets - Revert to Baseline
About This Task
| Family | Family ID | Datasheet Updated (Default) |
|---|---|---|
| Full Inspection | MI_INSPFULL | Full Visual Inspection |
| General Inspection | MI_INSP_GEN | General Inspection - Default |
| API 510 External Checklist | MI_API510EXT_CHECK | API 510 External Checklist - Default |
| API 510 Internal Checklist | MI_API510INT_CHECK | API 510 Internal Checklist - Default |
| API 510 Internal Exchanger Checklist | MI_API510IEX_CHECK | API 510 Internal Exchanger Checklist - Default |
| API 570 External Checklist | MI_API570EXT_CHECK | API 570 External Checklist - Default |
| API 653 External Checklist | MI_API653EXT_CHECK | API 653 External Checklist – Default |
| API 653 Internal Checklist | MI_API653INT_CHECK | API 653 Internal Checklist - Default |
| External PRD Checklist | MI_EXTNL_PRD_CHECK | External PRD Checklist |
| PRD Pop Test Checklist | MI_PRD_PT_CHECK | PRD Pop Test Checklist |
| Checklist Inspection Template | MI_GEN_INSP_TMP | Checklist Inspection Template |
- Using Family Management, edit the default datasheet of each family. Add a new section, Download Information with the following fields:
- Downloaded
- Last Downloaded By
- Last Downloaded Date
- Last Synced Back By
- Last Synced Date
- Run Revert to Baseline for each family.
Procedure
- Run the RevertToBaselineApp.exe file as administrator.The Revert To Baseline Login window appears.
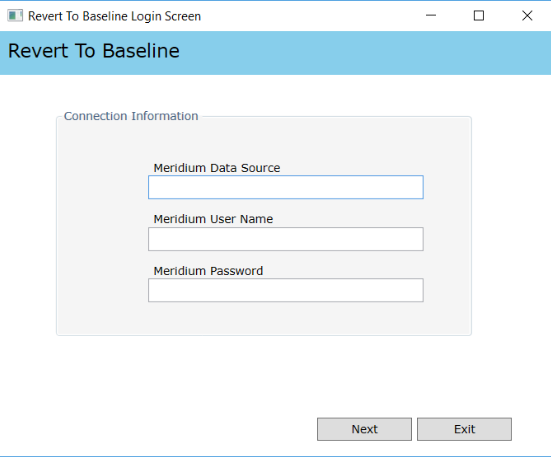
- Select the Inspection family that you want to update, and then select Revert to Baseline.The Various Options For Revert window appears.

Update the Query Parameter Type
After the database upgrade for APM, if the entity key fields are of the type string, you must modify the catalog query parameters to use the correct type by performing the following steps.
Procedure
Inspection Management Security Groups and Roles
The following table lists the baseline Security Groups available for users within this module, as well as the baseline Roles to which those Security Groups are assigned. In Cloud APM, Roles are assigned to Security Users through permission sets.
| Security Group | Roles |
|---|---|
| MI Inspection |
MI Mechanical Integrity Administrator MI Mechanical Integrity Power MI Mechanical Integrity User |
| MI Inspection Viewer |
MI APM Viewer MI Mechanical Integrity Viewer |
- Inspector
- Inspection Supervisor
- SC Recommendations Implementer
- SC Recommendations Reviewer
These roles are used in State Management.
| Family | MI Inspection | MI Inspection Viewer |
|---|---|---|
| Entity Families | ||
| Alert | View, Insert, Update, Delete | View |
| Certification | View, Insert, Update, Delete | View |
| Checklist Finding | View, Insert, Update, Delete | View |
| Conditional Alerts | View, Insert, Update, Delete | View |
| Corrosion | View, Insert, Update, Delete | View |
| Equipment | View, Insert, Update, Delete | View |
| Event | View, Insert, Update, Delete | View |
| Finding | View, Insert, Update, Delete | View |
| Human Resource | View | View |
| Inspection Method | View, Insert, Update, Delete | View |
| Inspection Profile | View, Insert, Update, Delete | View |
| Inspection Team Member | View, Insert, Update, Delete | View |
| Inventory Group Configuration | View | View |
| Potential Degradation Mechanisms | View | View |
| RBI Degradation Mechanisms | View | View |
| RBI Inspection Auto-Selection Criteria | View | View |
| Recommendation | View, Insert, Update, Delete | View |
| Reference Document | View, Insert, Update, Delete | View |
| Resource Role | View, Insert, Update, Delete | View |
| SAP System | View | View |
| Security User | View | View |
| Strategy | View, Update | View |
| Task | View, Insert, Update, Delete | View |
| Taxonomy References | View | View |
| Time Based Inspection Interval | View, Insert, Update, Delete | View |
| Time Based Inspection Setting | View, Insert, Update, Delete | View |
| Work Pack | View, Insert, Update, Delete | View |
| Relationship Families | ||
| Belongs to a Unit | View, Update, Insert, Delete | View |
| Checklist Has Finding | View, Insert, Update, Delete | View |
| Has Certifications | View, Insert, Update, Delete | View |
| Has Degradation Mechanisms | View | View |
| Has Findings | View, Insert, Update, Delete | View |
| Has Inspection Method | View, Insert, Update, Delete | View |
| Has Inspection Profile | View, Insert, Update, Delete | View |
| Has Inspection Scope | View, Insert, Update, Delete | View |
| Has Inspections | View, Insert, Update, Delete | View |
| Has Potential Degradation Mechanisms | View | View |
| Has Recommendations | View, Insert, Update, Delete | View |
| Has Reference Documents | View, Insert, Update, Delete | View |
| Has Roles | View, Insert, Update, Delete | View |
| Has Sub-Inspections | View, Insert, Update, Delete | View |
| Has Tasks | View, Insert, Update, Delete | View |
| Has Task History | View, Insert | View |
| Has Task Revision | View, Insert | View |
| Has Team Member | View, Insert, Update, Delete | View |
| Has Taxonomy Hierarchy Element | View | View |
| Has Taxonomy Mapping | View | View |
| Has Time Based Inspection Interval | View, Insert, Update, Delete | View |
| Has Work Pack | View, Update, Insert, Delete | View |
| Is a User | View | View |
| Is Planned By | View, Insert, Update, Delete | View |
| Is Executed By | View, Insert, Update, Delete | View |
Note that:
- The family-level privileges granted to the following families are also spread to all of their subfamilies:
- Event
- Taxonomy References
- The Has Task History relationship family is inactive in the baseline APM database.
- In addition to the families listed in the preceding table, members of the MI Inspection Security Group have View privileges to additional families to facilitate integration with the Risk Based Inspection module. Since these families are not used elsewhere in Inspection Management, they are not listed in this table.
Revert Inspection Management Dashboard to Baseline
Before You Begin
This action is required only if you have modified the Inspection Management dashboard.
About This Task
Procedure
- Select the check box next to the dashboard that you want to revert, and then select .The Confirm Delete window appears, asking you to confirm if you want to delete the selected dashboard.
- Select the check box next to the dashboard that you want to revert, and then select .The Catalog Folder Browser window appears.