
Use GraphQL Data in Operations Hub
This topic covers configuring a data source and query, and binding the values to widgets, using one of two supported approaches.
Before you begin
About this task
| Without Filtering | Applies when you want to use a static query without user input. |
| With Filtering | Applies when you want to allow users to enter filter criteria at runtime. |
Procedure
- Log in to the Operations Hub classic version.
-
Create the GraphQL data
source.
Use the values below to configure your GraphQL data source in Operations Hub:
Field Enter This Value Base URL https://webclient.graphql.your server hostnameAuth Type Select OAuth Auth Grant Type Select Password Auth URL https://uaa.graphql.your server hostname/uaa/oauth/tokenAuth Client Id, Auth Client Secret, Username, and Password For valid credentials, contact GE Vernova Support. 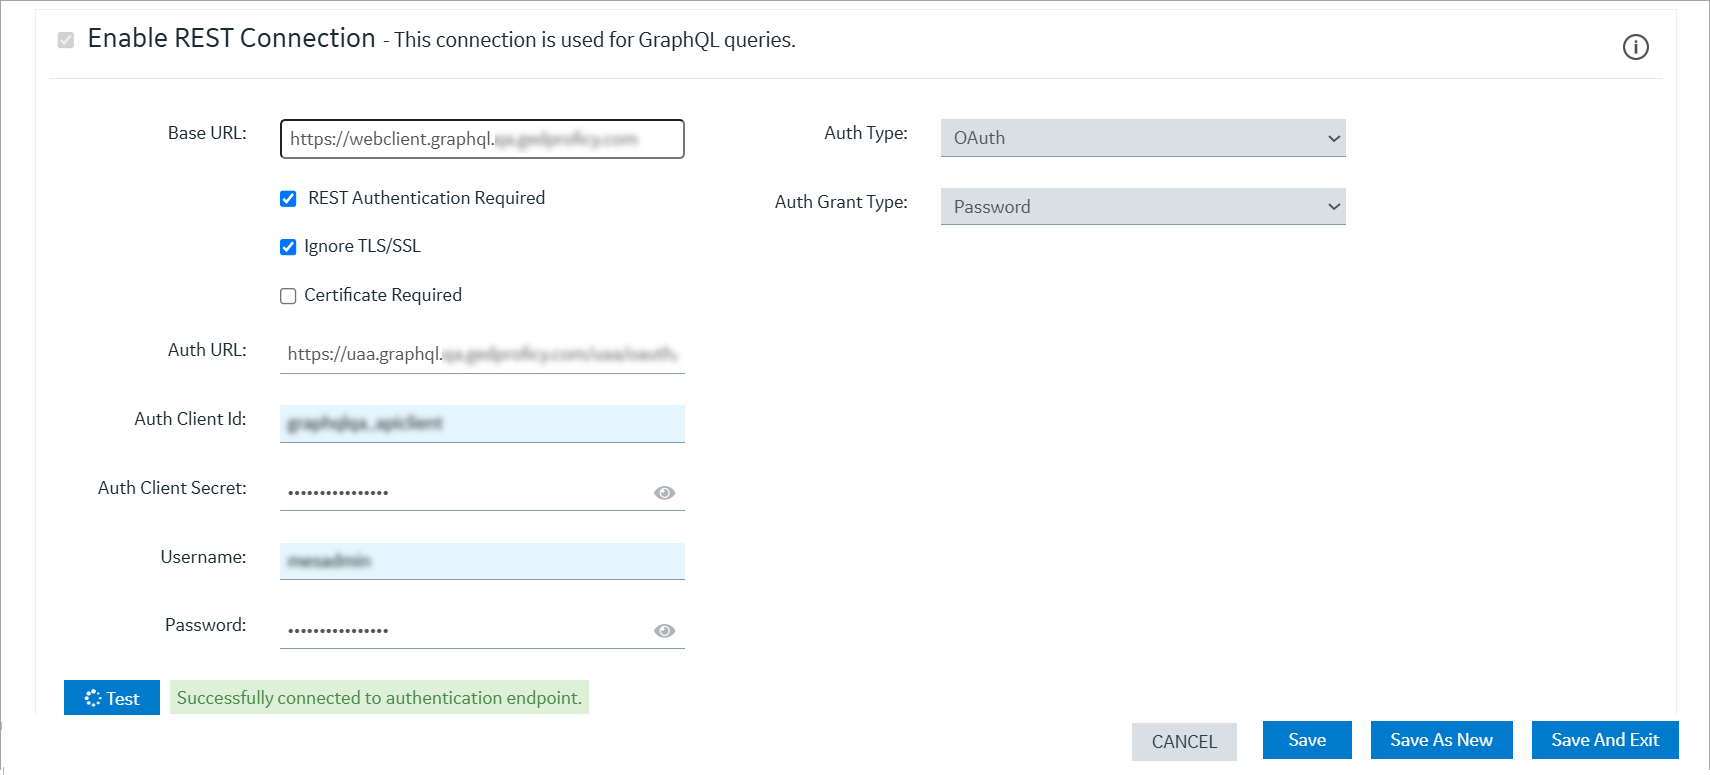
- Save and exit the data source screen.
-
Create the GraphQL query.
- If you want to create a static query that does not depend on user input, proceed with the steps described in GraphQL Without Filtering.
- If you want to create a query that accepts runtime input, proceed with the steps described in GraphQL With Filtering.
GraphQL Without Filtering
Create the GraphQL query using body parameters only.
Procedure
-
Use the values below to configure your GraphQL query in Operations Hub:
-
Add general details:
Field Enter This Value Data Source Select the GraphQL data source you configured in the previous steps. Query URL /graphql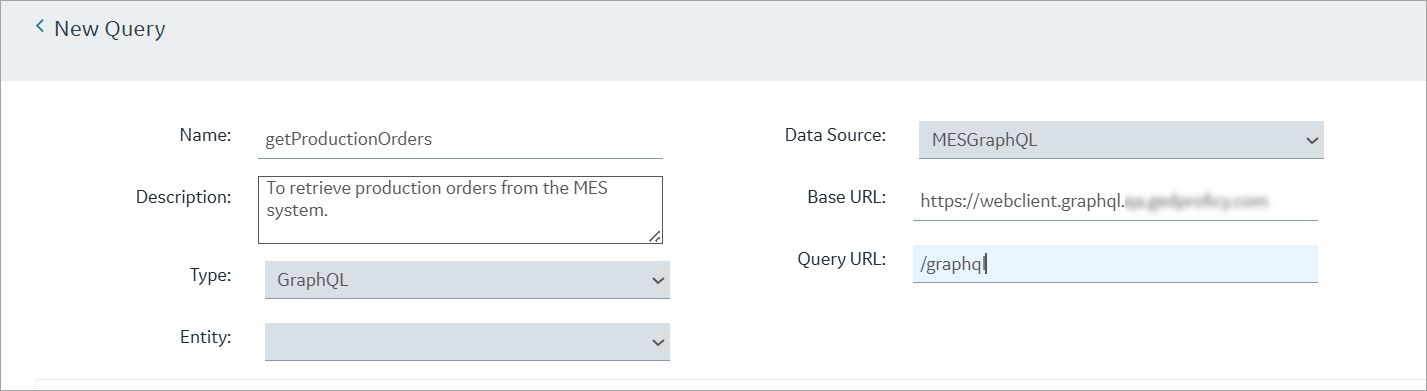
-
Add Body Parameters:
Field Enter This Value Value Key payloadType Select Fixed Value Browse Schema Open the schema browser and select the check boxes for the following: Tip:Use the keywordproduct queryin the search bar to find the fields faster.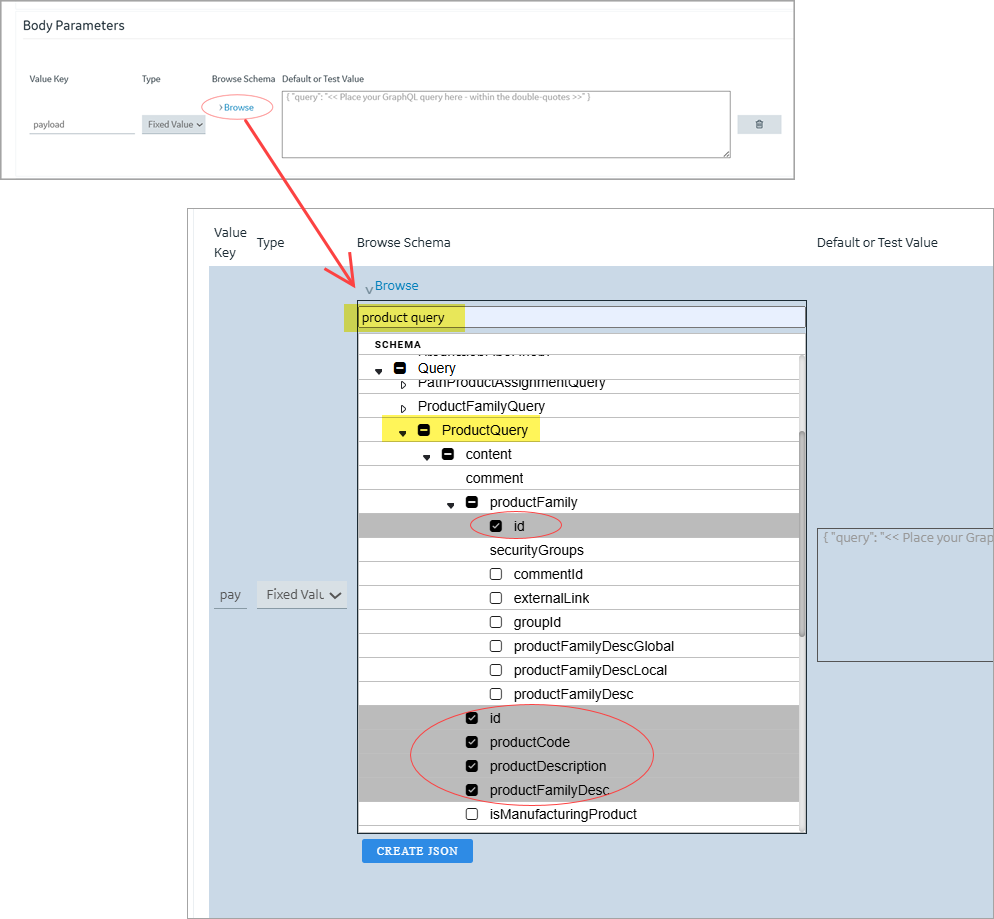
-
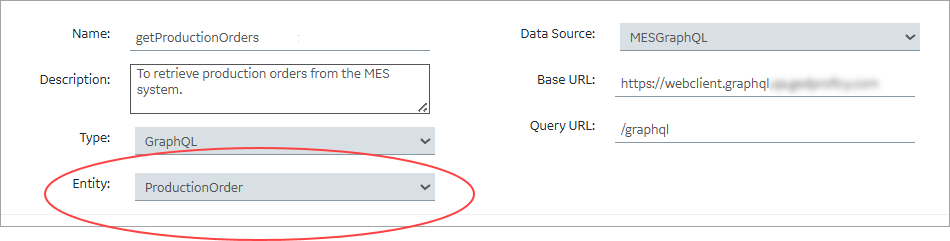
Set the entity created from results.
-
Add general details:
- Log in to Configuration Hub and access the Operations Hub new layout.
- Create an App and App Page.
-
On the page, configure the GraphQL query as follows:
-
Go to the Data tab and add the GraphQL query.
See Data Tab

-
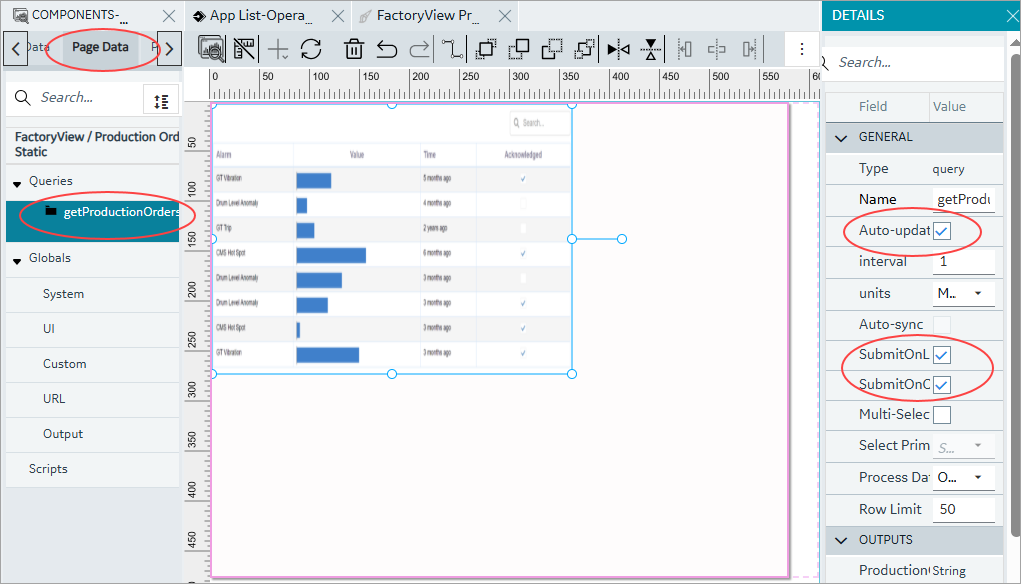
Go to the Page Data tab, select the GraphQL query
and set these properties:
- Select the Auto-update check box.
- Select the SubmitOnLoad check box.
- Select the SubmitOnChange check box.
-
Go to the Data tab and add the GraphQL query.
-
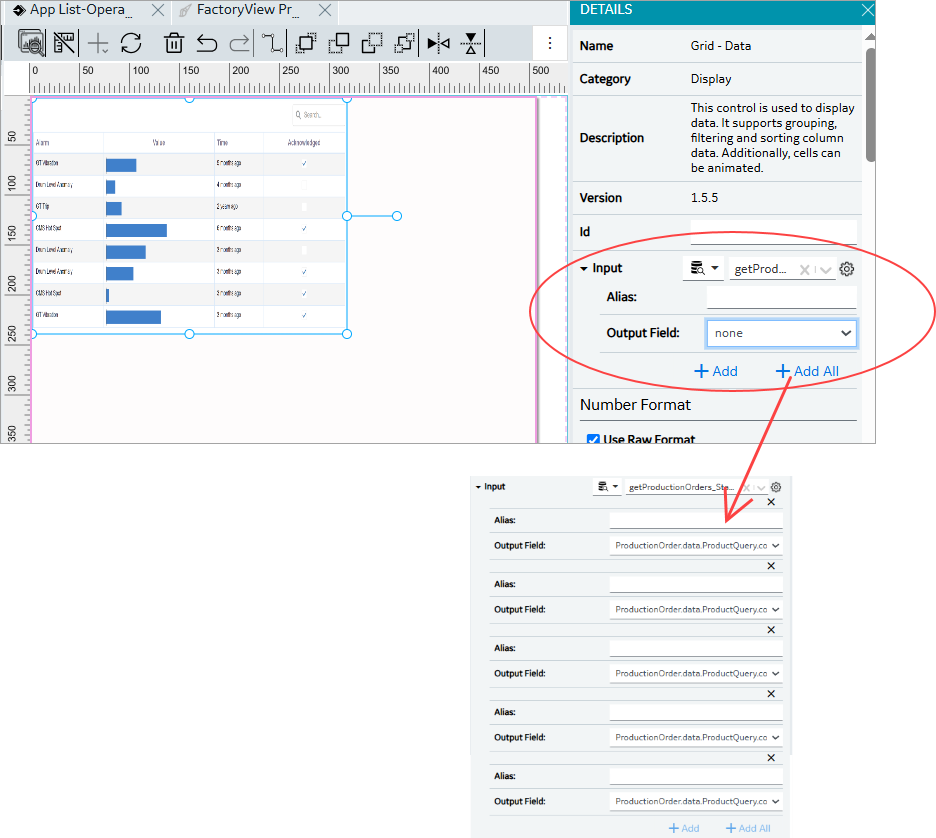
Drag and drop DataGrid on the page and
configure its properties:
- For Input, choose the Query option, from dropdown select the GraphQL query.
- Select + Add All to include all the query output fields.
- Select Save on the Configuration Hub toolbar.
- To preview, launch the App at runtime and verify the results.
GraphQL With Filtering
Create the GraphQL query using both variables and body parameters.
Procedure
-
Use the values below to configure your GraphQL query in Operations Hub:
-
Add GraphQL Variables:
Field Enter This Value Key filterType Select Input Field Default or Test Value {}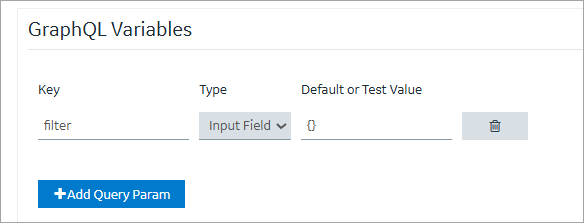
-
Add GraphQL Variables:
- Log in to Configuration Hub and access the Operations Hub new layout.
- Create an App and App Page.
-
On the page, configure the GraphQL query as follows:
-
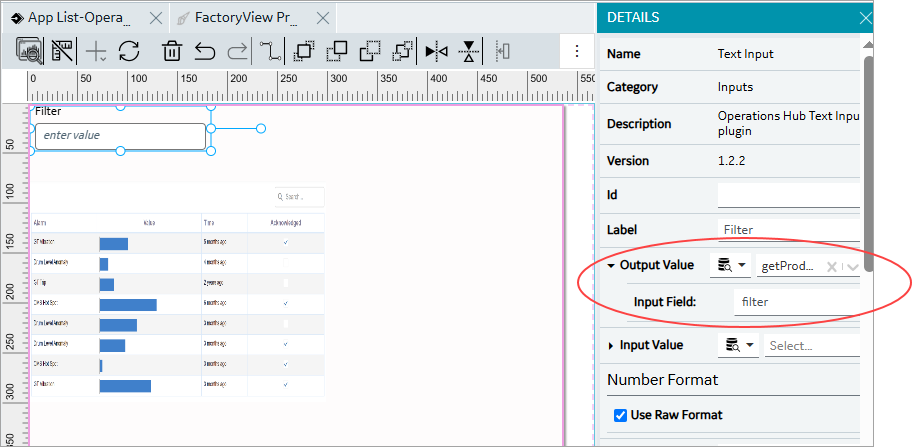
Drag and drop these widgets on the page and configure their properties:
Text Input - For Output Value, choose the Query option, from dropdown select the GraphQL query.
- To set target data, from Input Field
dropdown, select
filter.
DataGrid - For Input, choose the Query option, from dropdown select the GraphQL query.
- Select + Add All to include all the query output fields.
- Select Save on the Configuration Hub toolbar.
- To preview, launch the App at runtime and verify the results.