
Importing SmartSignal Classic Assets
Import a SmartSignal Analytic Instance from a SmartSignal Classic Asset Using a Transfer File
If you previously created a SmartSignal asset in the SmartSignal Classic system, you can import that asset into APM as a SmartSignal analytic instance.
Before You Begin
About This Task
Procedure
Create Asset JSON from Data in an Input File
Before you create APM assets from an Input Excel File, you can use these steps to verify the data. In addition, creating asset JSON validates that the data in the import file can be successfully converted to be used in APM.
Before You Begin
Procedure
Import an Analytic Template from a SmartSignal Classic Blueprint File
If you want to add a new analytic template of the SmartSignal type or add a new version of an existing SmartSignal analytic template to APM, you must import the analytic template from a .zip file exported from SmartSignal Classic Blueprint Center.
Before You Begin
Export a SmartSignal Classic Blueprint as an APM analytic template.
Procedure
- Depending on whether you want to add a new template or add a new version of an existing template, choose one of the following:
- If you want to add a new template, select
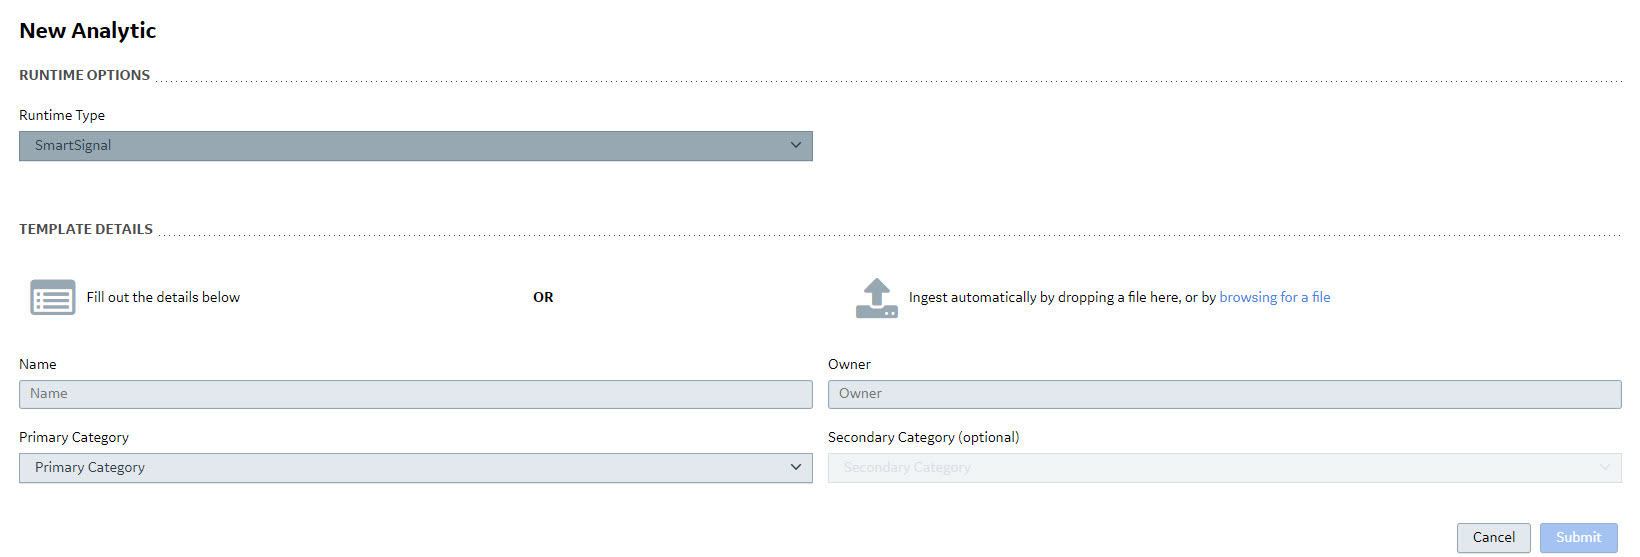
 , and then, in the Runtime Type drop-down list box, select SmartSignal.
 - If you want to add a new template version for an existing template, select the template that you want to update, and then select Edit.
The workspace for a new or selected analytic template appears. The image below displays the New Analytic workspace.
- If you want to add a new template, select
Results
- The workspace for the newly created or updated analytic template appears.
- All boxes on the workspace are updated automatically.
- If you added a new template, the following information appears under the template name: Version 1.0.0.
- If you added a new version of an existing template, the new version is automatically made the current version, and it appears in the drop-down list of versions under the template name.Note:
Version numbers are determined by the degree of changes made to the template.
- A change to the first number in the version number indicates a major change to the template. A major change is the result of a structural modification to the template, such as the addition or removal of a tag. If a template with a major change is made current, you should review all models associated with that template.
- A change to a number other than the first one in the version number indicates a minor change to the template. A minor change, such as a modification to a rule expression, involves no structural changes to the template.